


Go back
Welcome to the new LiveSchool!


Looking for the old experience? Click here. But remember, it goes away March 10th!
If LiveSchool is syncing with your SIS via Clever, click here. This article is for schools that added students and staff via Launch Files.
LiveSchool lets you create unlimited rosters so you can always pull up the correct group of students whether for a class, after-school club, or even bus group.
Our Roster Picker allows you to select, rename, and hide rosters to make it easier to find your rosters quickly.
As an admin, your Roster Picker will include a "teachers" tab to view all rosters organized by teacher – perfect for observing or covering a class.
Teachers can create and share rosters with other teachers, to minimize duplicating work (and rosters).
Below we share more on how to create and share rosters, and access them on the roster picker.
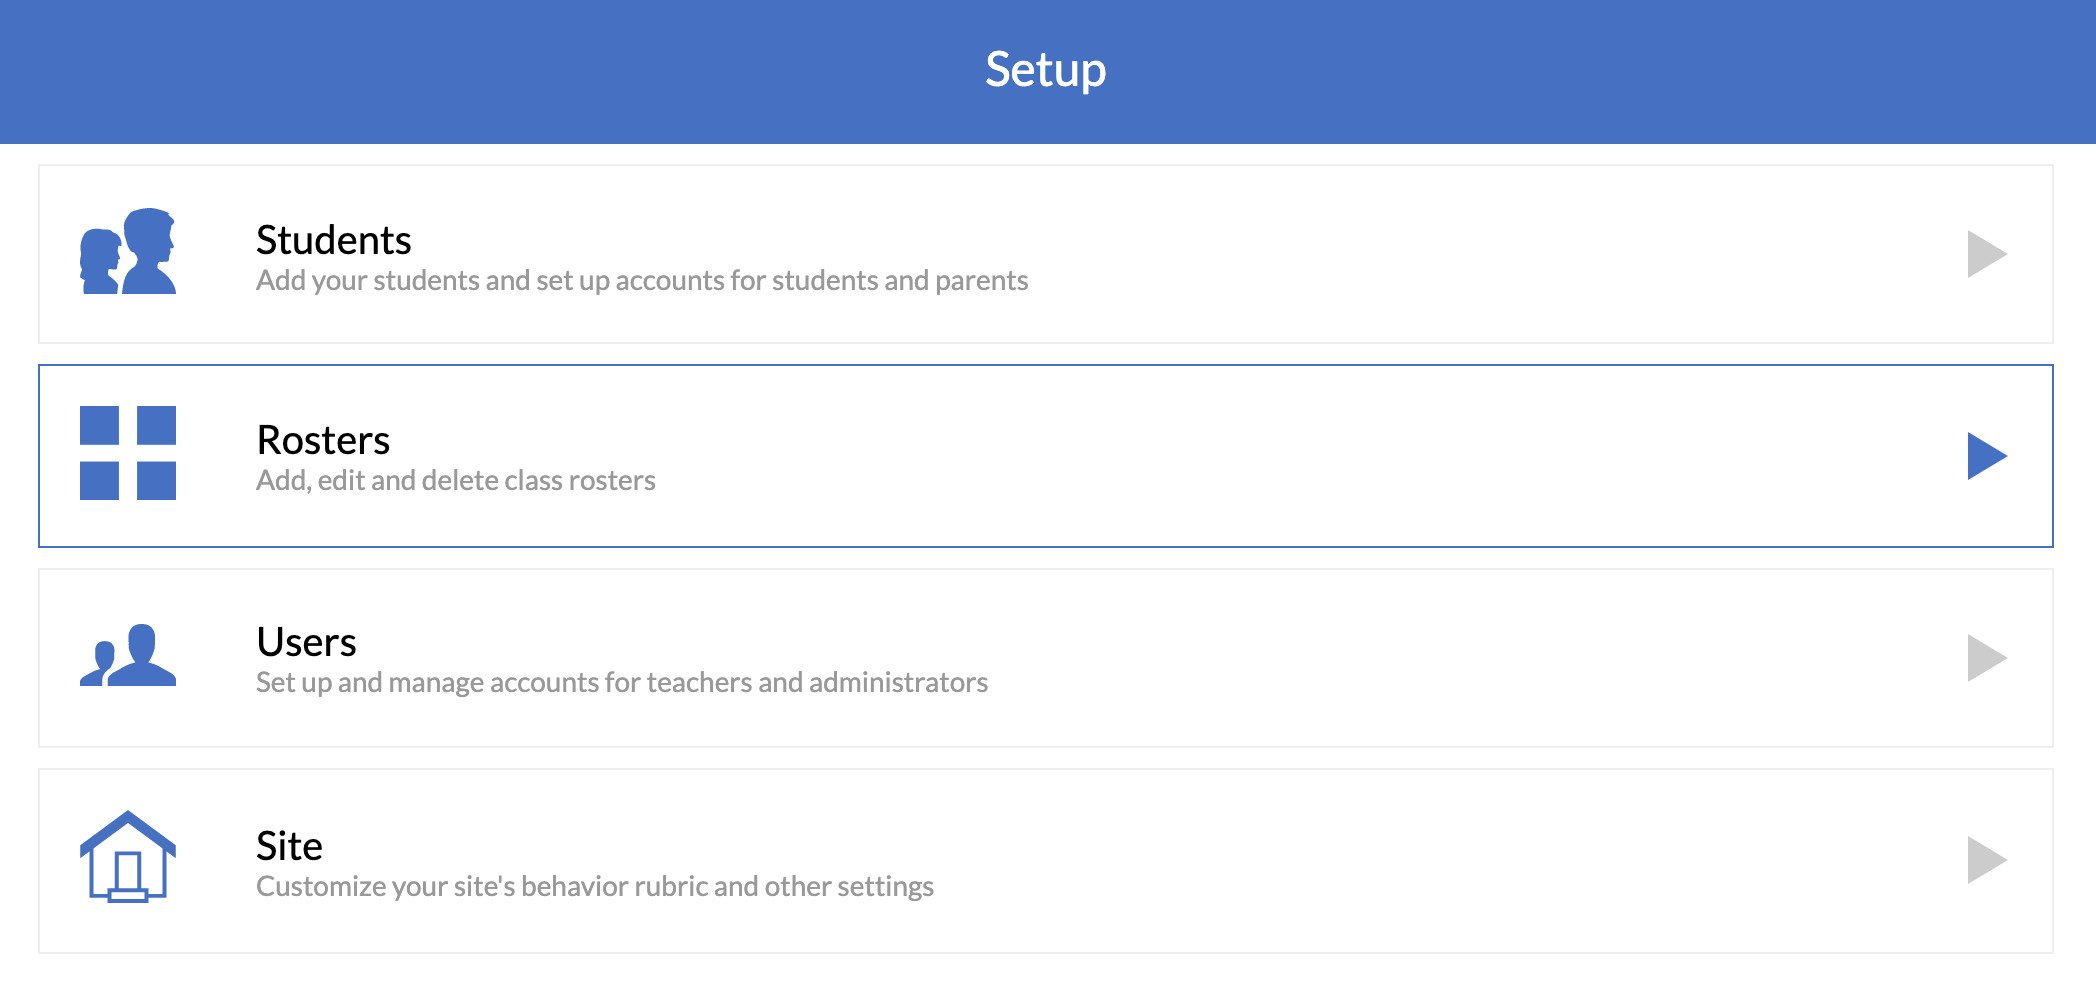
To get started with Rosters, first go to Setup > Rosters.
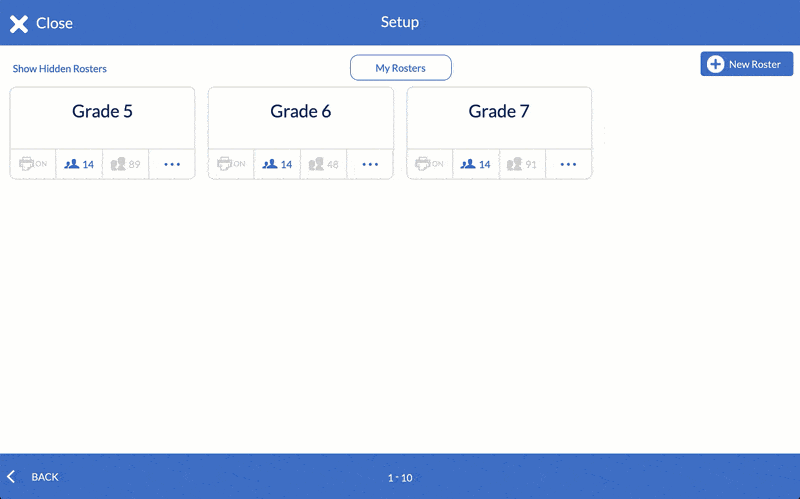
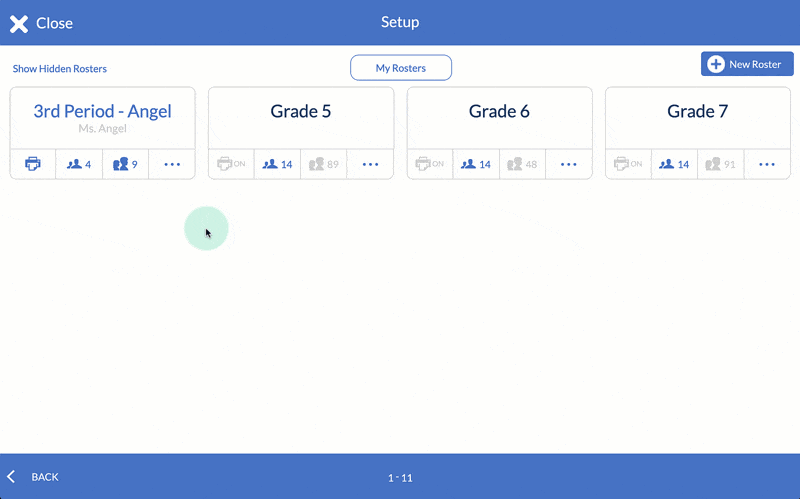
To create a new roster, click New Roster and name your roster. Add a last name or initials to help identify the roster if using a common name like "1st Period".
Next, click the Add Students tab in the top left corner, then the down arrow and select a roster to choose students from.
Select the students you'd like to add to the roster. The students you select are remembered as you switch between rosters. Then click Add Students in the bottom right to add your students to your roster!
Adding and removing students uses a similar process to creating the rosters. Click Add or Remove Students and you'll be shown the current students on the roster.
You can select students on this screen and click Remove in the bottom right to remove them from the roster.
Or you can click the Add Students tab in the top left, select students to add to the roster, then click Add Students in the bottom right and your roster will be updated.
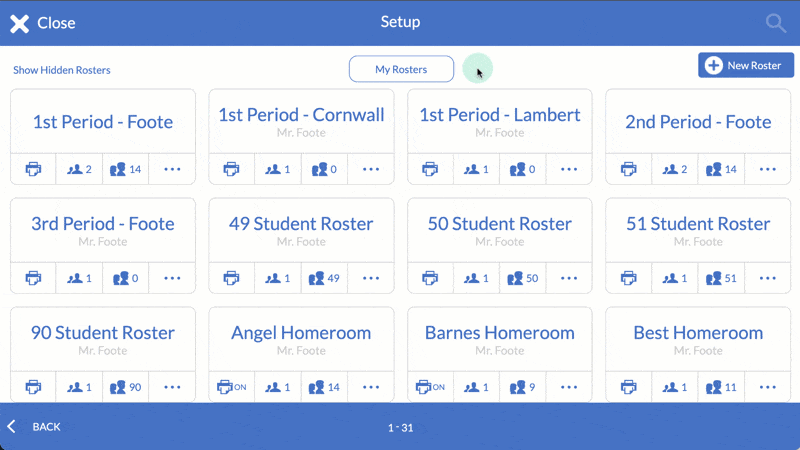
If you need to share a roster that you didn't create, make sure to click My Rosters and select All Rosters to view every roster in your LiveSchool site.
Click the Share this Roster button, then use the tabs at the top of this screen to choose admin and teachers with whom you'd like to share the roster.
When you click Save those teachers and admin will have access to the roster instantly.
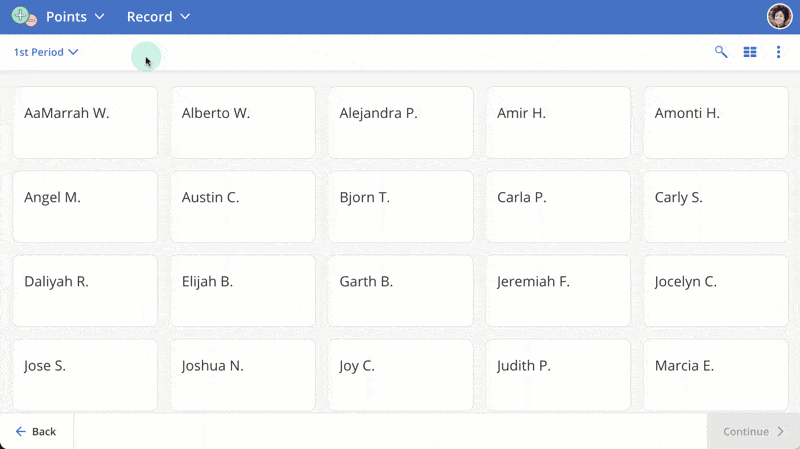
The Roster Picker makes it easy to organize your rosters so that you're able to quickly select the group of students you need.
You'll see the Roster Picker throughout LiveSchool, always in the same spot and providing the same functionality.
Just click the Roster Picker in the top left, and you'll see your "Rosters" list, which is any roster that you've created or has been shared with you.
The Roster Picker also has a "Grades" tab, which you can use to view all of the students in each grade.
And Admins have access to a "Teachers" tab, which organizes rosters by Teacher – helpful if you ever observe or cover a class.
You can hide rosters that you use less often to keep your Rosters list clean.
And you can click the 3 dots then rename if you ever need to rename the roster.
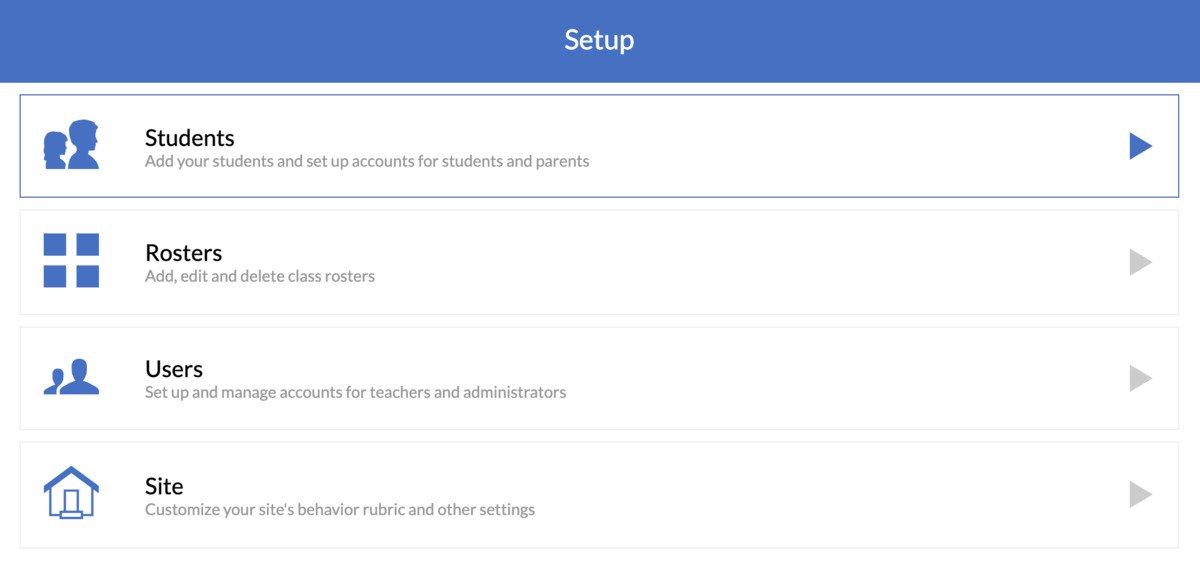
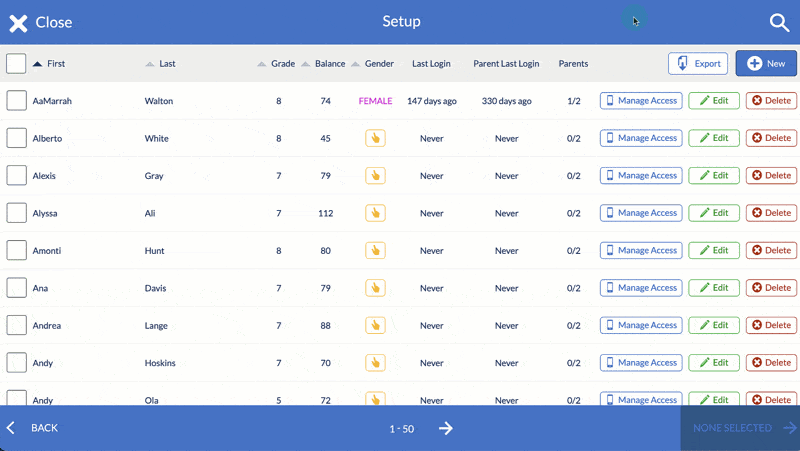
To manage your students, first go to Setup > Students.
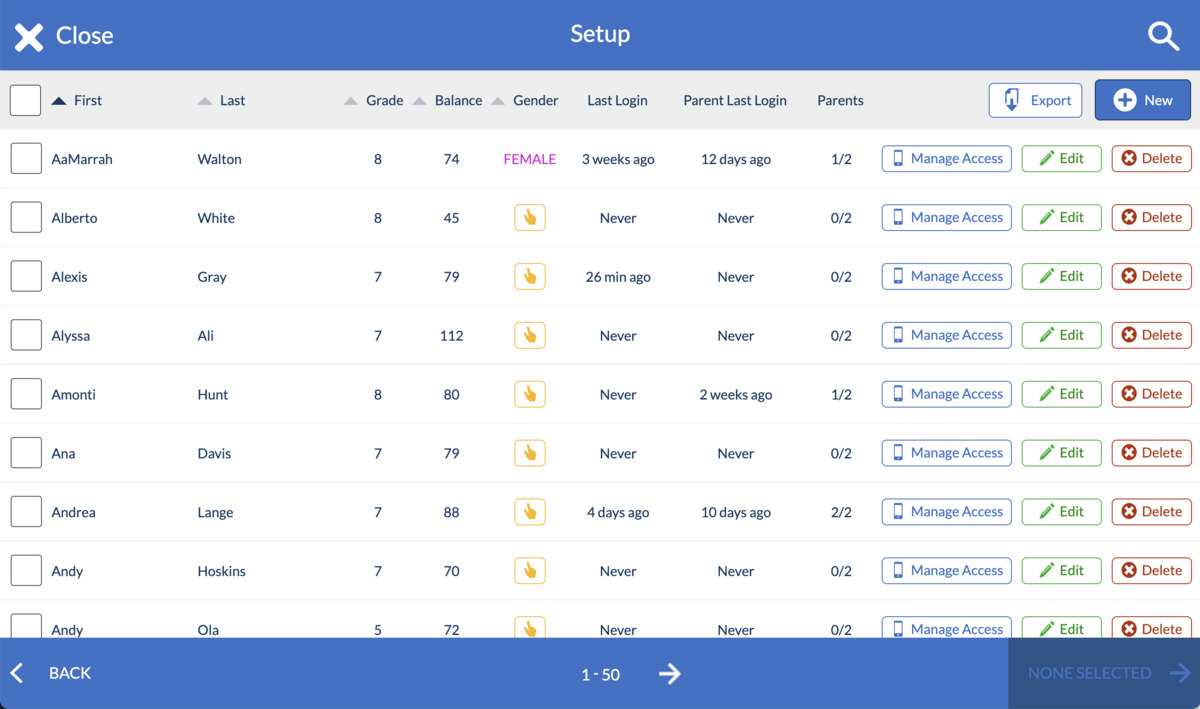
Your student list shows you every student in your LiveSchool site, as well as their grade and current point balance. You'll also see information to help you monitor the student and their parent's usage of their LiveSchool accounts.
"Last Login," and "Parent Last Login" shows the last time the student and parent signed in to their LiveSchool account respectively, or if they've never signed in at all. The "Parents" column shows you how many of the parent codes (out of 2) have been registered to a LiveSchool account.
You'll see a column for gender as well. Currently only Male and Female are available, but please note gender is not viewable to students and parents in their account.
As an Admin, you can add, edit, or delete a student, as well as manage access for a student (below).
Teachers can only manage a student's access, they cannot add, edit, or delete students.
Admins can add a new student at any time by clicking New in the top right corner. Add a name and gender, but note that the gender is not visible to the students or parents on their LiveSchool account.
Manage Access helps you assist students and parents with logging into their student and parent accounts.
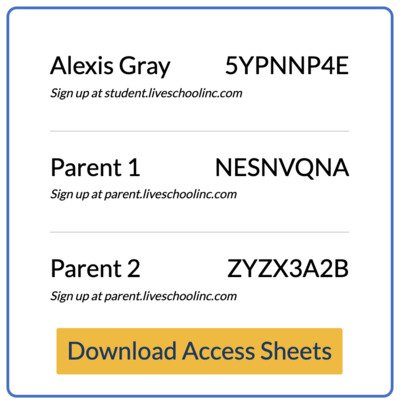
If a student or parent has not created an account, you'll see their access codes when you click Manage Access, and can download an access sheet for the student and parents.
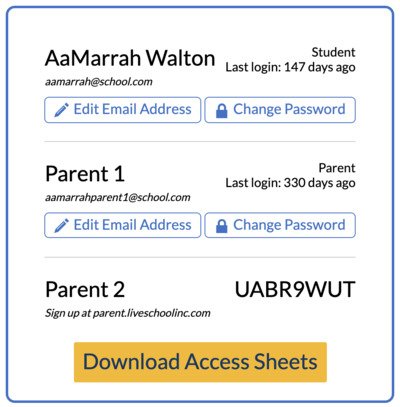
If a student or parent has created an account, clicking Manage Access allows you to see the email address the student and parents used to create their account, or you can edit their email address, and change their password if needed.
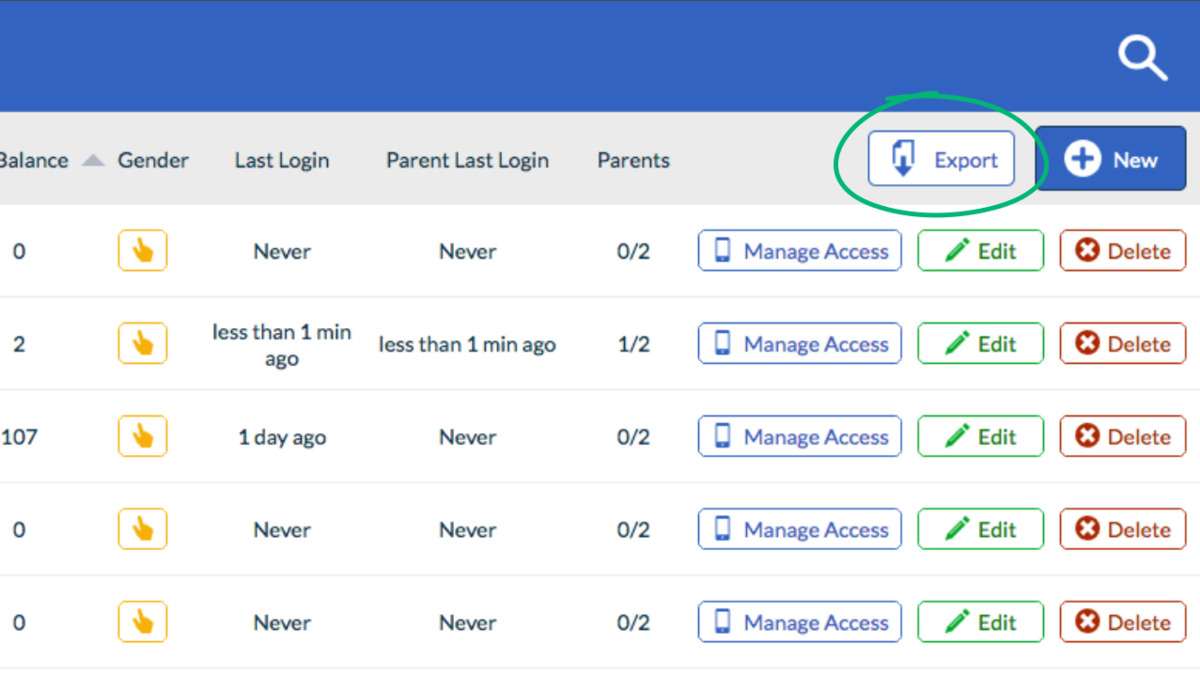
If you ever need to export your list of students, their grade or point balances, or your students' and their parents' access codes, click Export in the top right.
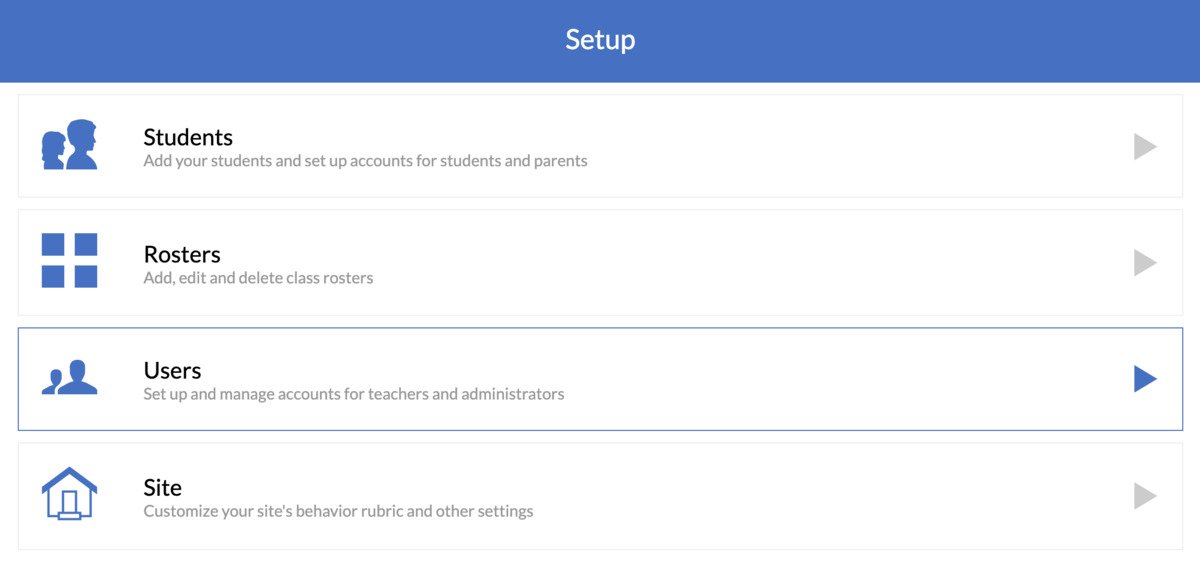
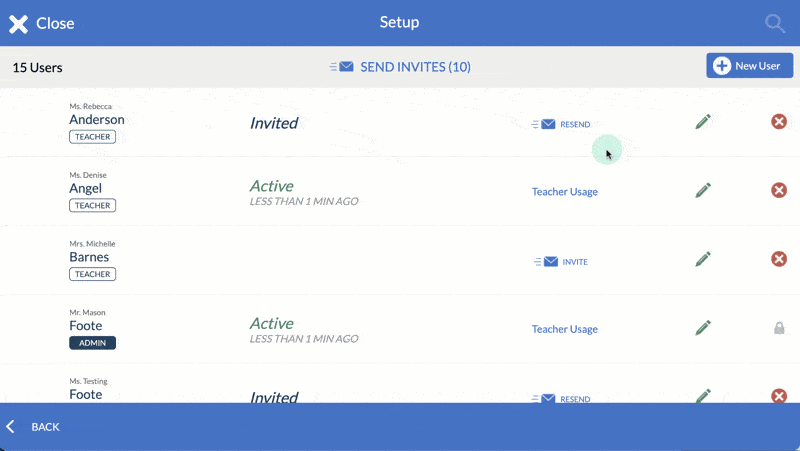
You can manage your list of Admin and Teachers in LiveSchool by going to Setup > Users.
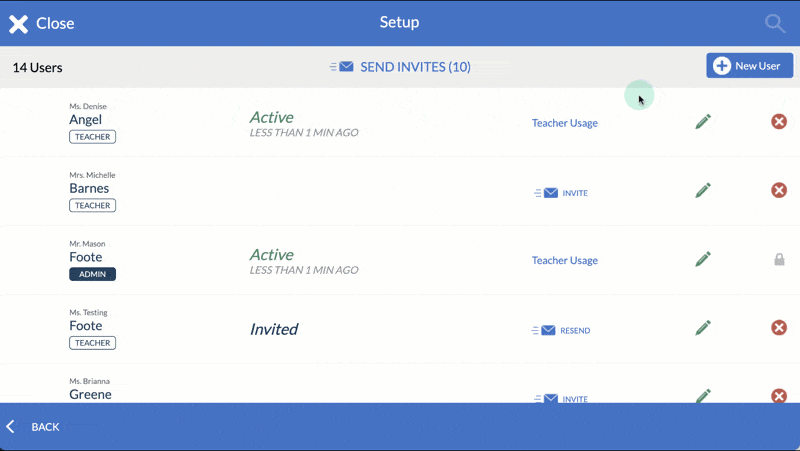
You can add a new Teacher or Admin by clicking New User in the top right corner.
Add the teacher or admin's information, and choose whether they should have teacher or admin permissions. When you click Add User LiveSchool will automatically send them an email to invite them to create a LiveSchool account.
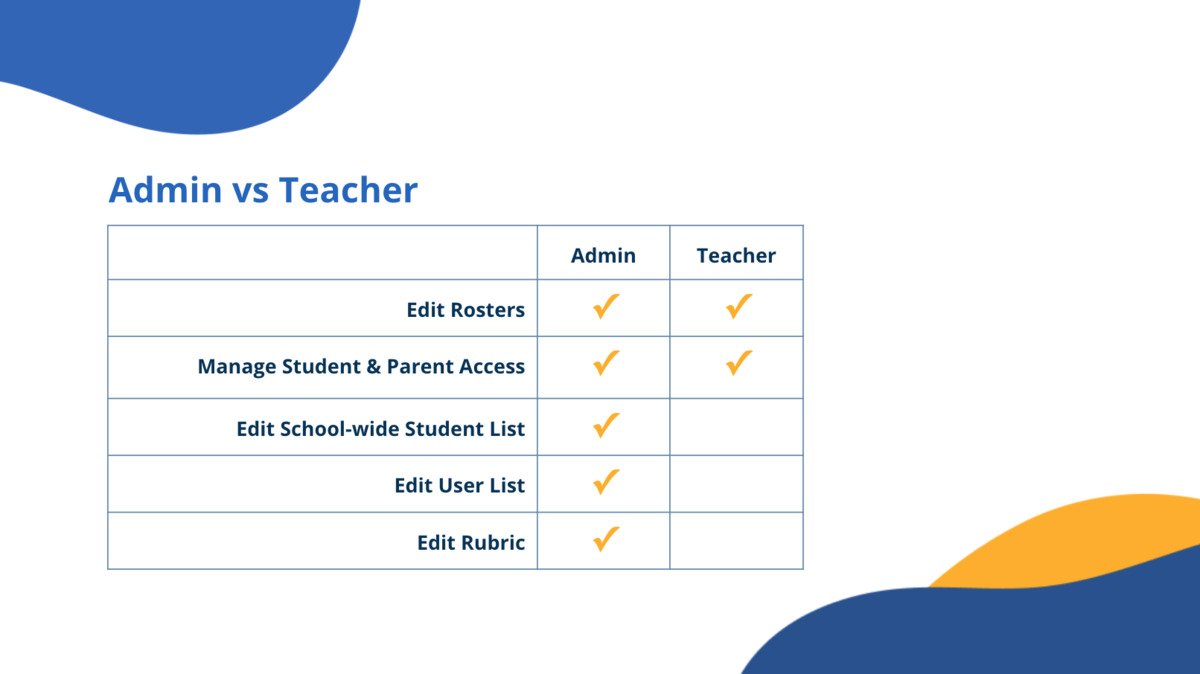
The table below explains the difference between Admin and Teachers in LiveSchool.
You can edit an Admin or Teacher, whether you need to change their title, update their email address, or change a teacher's account type to Admin.
You can also delete an Admin or Teacher. Deleting an Admin or Teacher does not delete the points they awarded students, but that person will no longer be able to log in and they will not appear on your Teachers Scoreboard (more on the Teachers Scoreboard below).
As you're launching LiveSchool, it's powerful to check in on teacher adoption so you know which teachers might need some support..
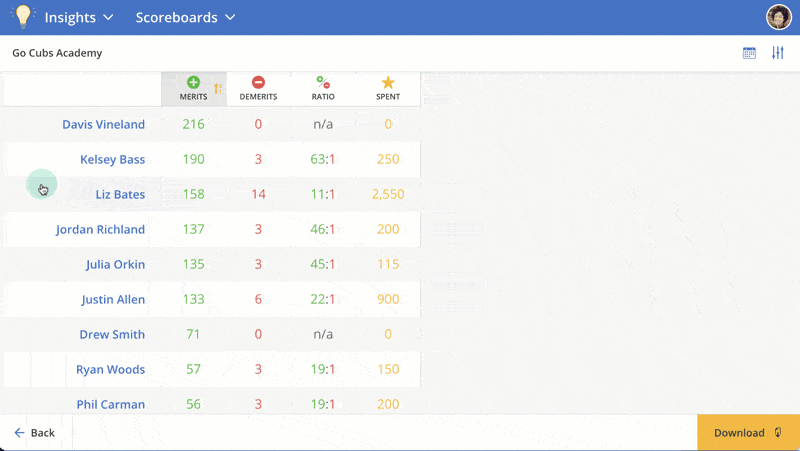
The Teachers Scoreboard (only viewable to Admin) helps you see the points all of your teachers are awarding in LiveSchool.
To get the to the Teachers Scoreboard, go to Insights > Scoreboards > Teachers.
You'll see the total positive (Merits) and negative (Demerits) points they've awarded, their ratio of positive to negative points, as well as the total points students have spent with that teacher running the Rewards Store.
Click a teacher's name to access that teacher's Dashboard. The Teacher Dashboard provides a helpful overview to understand whom teachers are awarding points to most, and for what behaviors.
You can also click any of the numbers on the Dashboard to access a pre-filtered Timeline. In the example above, we click the Liz Bates's 158 positive points, which takes us to Timeline only showing the positive points Liz Bates has awarded.
Combining the Teachers Scoreboard with Dashboards and Timeline can provide real-time information as you launch LiveSchool, helping understand how teachers are awarding points and where to direct your support.


